
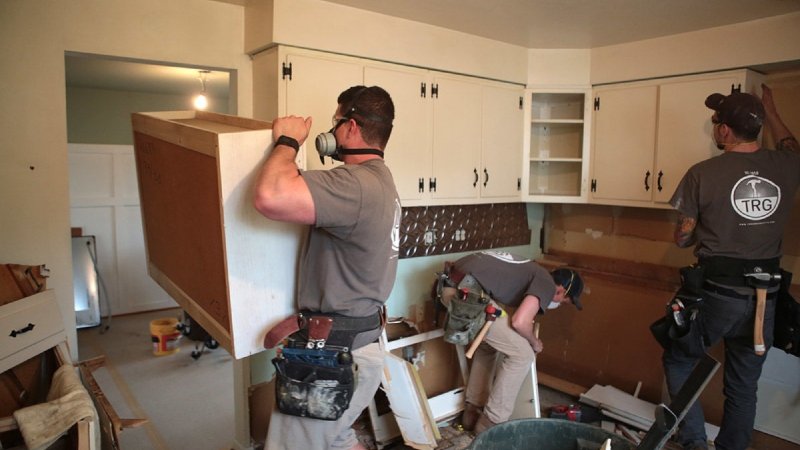
A DIY kitchen upgrade is one of the most rewarding home improvement projects a homeowner can take on. It can transform the functionality and appearance of a home while adding long-term value. However, before the new cabinets, countertops, and appliances are installed, there is one major phase that often creates unexpected challenges: demolition.
Kitchen demolition generates a large and varied amount of debris in a short period of time. Cabinets, countertops, flooring, drywall, and old fixtures all need to be removed and disposed of properly. Without a plan in place, debris can quickly take over the workspace, slow progress, and create safety concerns. Managing demolition waste effectively is essential for keeping the project organized and on schedule.
Why Kitchen Demolition Creates So Much Debris
Kitchens are dense spaces filled with built-in components and layered materials. Unlike other rooms, where updates might involve paint or flooring, kitchen renovations typically require removing multiple systems at once.
Common demolition materials include:
- Cabinets and shelving units
- Countertops made of laminate, stone, or solid surface materials
- Tile backsplashes and flooring
- Drywall and insulation
- Old appliances and fixtures
- Plumbing components and hardware
Each of these materials contributes to both the volume and weight of debris. Even a modest kitchen can generate a surprising amount of waste once demolition begins.
Planning Waste Removal Before You Start
One of the biggest mistakes DIYers make is starting demolition without a clear waste removal plan. It is easy to assume debris can be handled gradually, but demolition moves quickly, and materials pile up faster than expected.
Planning ahead allows you to:
- Keep work areas clear from the beginning
- Avoid repeated handling of debris
- Reduce clutter inside the home
- Maintain a safer workspace
Having a disposal solution ready before the first cabinet is removed helps ensure the project starts on the right foot.
Choosing the Right Disposal Approach
For smaller projects, some homeowners attempt to use standard trash service or make multiple trips to a local disposal facility. However, kitchen demolition often produces more debris than these options can handle efficiently.
A temporary dumpster provides a centralized location for all waste generated during the project. Instead of stacking debris in the garage or driveway, materials can be removed immediately as they are taken out of the kitchen.
Many homeowners coordinate disposal through providers such as Waste Removal USA to ensure they have adequate capacity for the entire demolition phase.
Estimating Debris Volume Accurately
Before selecting a dumpster or disposal method, it is important to estimate how much debris the project will generate. Several factors influence this estimate:
- Size of the kitchen
- Type and quantity of cabinetry
- Countertop materials
- Flooring type and thickness
- Extent of wall removal or modification
For example, removing tile flooring and a tile backsplash will generate heavier debris than removing laminate surfaces. Understanding these differences helps ensure the disposal solution matches the project scope.
Organizing Demolition for Efficient Cleanup
The way demolition is approached can have a significant impact on how manageable the debris becomes. Rather than tearing everything out at once, many DIYers find it helpful to work in sections.
A structured approach might include:
- Removing upper cabinets first
- Clearing countertops and base cabinets
- Demolishing flooring and backsplash
- Addressing drywall or structural changes
By working in stages, you can move debris out consistently rather than allowing it to accumulate all at once.
Breaking Down Materials to Save Space
Bulky items such as cabinets and countertops can take up a large amount of space if left intact. Breaking these materials down into smaller pieces helps maximize the capacity of your disposal container.
For example:
- Cabinets can be disassembled into panels
- Countertops can be cut into manageable sections
- Large pieces of drywall can be stacked flat
Taking the time to break down materials reduces wasted space and helps prevent your container from filling too quickly.
Managing Heavy Materials Carefully
Kitchen demolition often involves heavy materials such as tile, stone countertops, and dense cabinetry. These items can add significant weight to your debris pile.
To manage weight effectively:
- Distribute heavy materials evenly
- Avoid concentrating weight in one area
- Monitor how quickly the container fills
Being mindful of weight is just as important as managing volume. Overloading a container can create challenges during removal and may lead to additional handling.
Keeping the Work Area Safe and Clear
As demolition progresses, debris can create obstacles that make it harder to move around the kitchen. Sharp edges, exposed nails, and loose materials can pose safety risks.
Removing debris consistently helps:
- Maintain clear walkways
- Reduce tripping hazards
- Improve visibility in the workspace
- Allow tools and materials to be organized more easily
A clean work area makes the project safer and more efficient, especially in a confined space like a kitchen.
Avoiding Common DIY Cleanup Mistakes
Many homeowners underestimate how quickly demolition waste accumulates. This can lead to several common issues:
- Running out of space for debris
- Creating large piles that must be moved later
- Blocking access to work areas
- Delaying the start of installation work
Planning ahead and removing debris as you go helps prevent these problems and keeps the project moving forward.
Timing Cleanup with Project Phases
Kitchen renovations often transition quickly from demolition to installation. Once the old materials are removed, new cabinets, flooring, and appliances need to be brought in.
Coordinating waste removal with this transition ensures that the space is ready for the next phase. Removing debris before new materials arrive prevents congestion and allows installers to work efficiently.
Scheduling pickup at the right time helps free up space for deliveries and installation work.
Preparing for Final Debris Removal
Even after the main demolition is complete, smaller amounts of debris will continue to be generated. Packaging, trim pieces, and leftover materials from installation all need to be removed before the project is finished.
Having a disposal solution available through the final stages allows you to complete a thorough cleanup without additional effort.
A clean kitchen at the end of the project makes the transition to everyday use much smoother.
Managing demolition debris is a critical part of any DIY kitchen upgrade. Without a clear plan, waste can quickly overwhelm the workspace and slow progress. By planning disposal in advance, choosing the right container, and removing debris consistently throughout the project, homeowners can maintain an organized and efficient renovation process.
Effective debris management supports safer working conditions, reduces delays, and helps ensure the project stays on schedule. With the right approach, DIYers can focus on building their new kitchen rather than dealing with the challenges of accumulating demolition waste.